Difference between revisions of "More about adding titles to main sections"
| Line 2: | Line 2: | ||
| − | == Detailed instructions | + | == Detailed instructions == |
[[image:106.png|555]] | [[image:106.png|555]] | ||
Revision as of 18:34, 5 February 2009
View version with full-color screen shots (205)
Detailed instructions

1. Turn editing on. (button in the top right-hand corner of main course page)
2. Once editing is turned ON, your page will change from the clean view (seen by students) to the editing mode. What's an easy way to tell if editing is turned on? Any time that you see the editing icons (especially the “pencil” icon) and drop down menus (such as Add a resource / Add an activity) you are ready to edit your course.
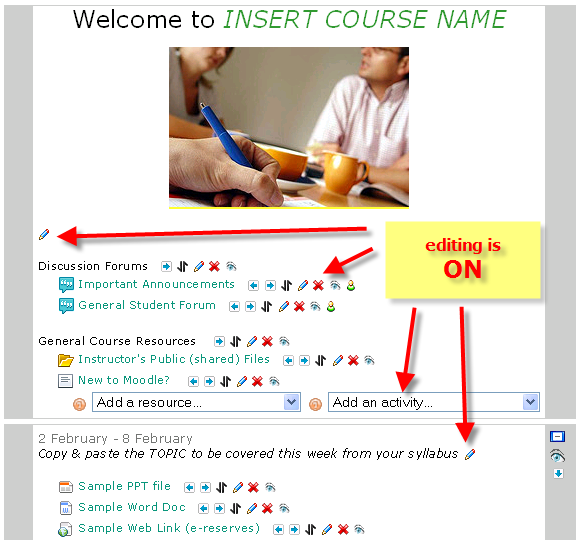

3. At the top of your course page (above the News Forum), and at the top of each of the numbered weeks/topics on your main course page you will see a single icon of a pencil. This is Moodle icon for editing that item.
4. Click this EDIT icon (pencil) to edit the top-most general course introduction area for your course, and to give titles (or summary text) to each of the main numbered weeks/topics on your main course page.
5. When you are finished, remember to click SAVE CHANGES at the bottom of the page.
6. You should now see the text that you entered.
Moodle TIP: It can be useful to occasionally turn editing OFF as you work, in order to get a cleaner view of your course page.
Screenshot of two sections from the “Five Easy Steps” moodle course
Back to [Course Editors FAQ]