Difference between revisions of "ProfCast"
| Line 111: | Line 111: | ||
| − | + | [[Image:firststep.jpg]] | |
Revision as of 15:16, 22 December 2008
ProfCast is a versatile, powerful, yet very simple to use tool for recording presentations including PowerPoint and/or Keynote slides for creating enhanced podcasts. ProfCast provides a low cost solution for recording and distributing lectures, special events, and presentations as podcasts. ProfCast offers an integrated workflow that makes creating, recording, and publishing podcasts easy. It's as simple as Launch, Load, and Lecture!
ProfCast provides live presentation recording, synchronization of slides with audio, Keynote and PowerPoint support, RSS generation, and publishing support. All elements of your presentation, including slide timings, bullet point builds, and voice narration, are recorded. ProfCast allows you to record your presentation as you give it, using either Apple's Keynote or Microsoft PowerPoint! ProfCast also helps you publish your recorded presentation as an enhanced podcast, complete with RSS.
ProfCast is the perfect solution for professionals and educators looking to provide more flexible, richer media to supplement traditional pedagogical tools such as books, course packs, or notes.
(source: http://www.profcast.com/public/index.php)
Tutorial for Profcasting
This tutorial will guide you through a step by step process for creating Profcast presentations. For questions and additional assistance, please come see us at the Digital Media Commons located on the second floor of the Kade building on campus.
Both the laptops and desk tops at the Digital Media Commons (DMC) have the Profcast software. If you choose to purchase the software for your own personal computer the cost from the company is sixty Dollars.
The following are the steps to follow for creating a Profcast presentation with the computers from the DMC. Some of these steps help the user avoid having problems with the transfer of data and the final editing process.
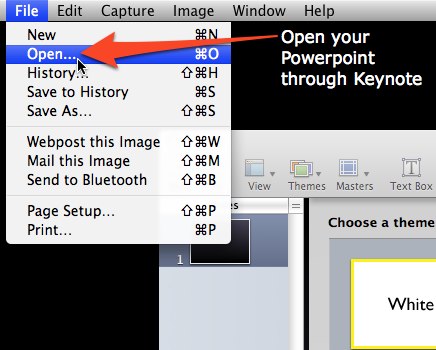
Step 1: Open the Keynote program. Keynote is Apple’s software comparable to powerpoint.
Step 2: Open your powerpoint slide through the Keynote Program. ( Although a user can use powerpoint directly with Profcast, our staff has determined there are some problems that come up with the audio quality and the transfer of data, hence we recommend Keynote)
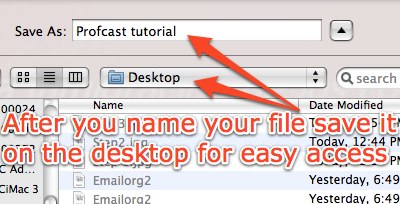
Step 3: Save your powerpoint presentation as keynote file. Make sure you name your file.
Step 4: Once you have saved your powerpoint as a Keynote file, save it on the desktop. By doing this, you will save yourself a few steps in order to access your work.
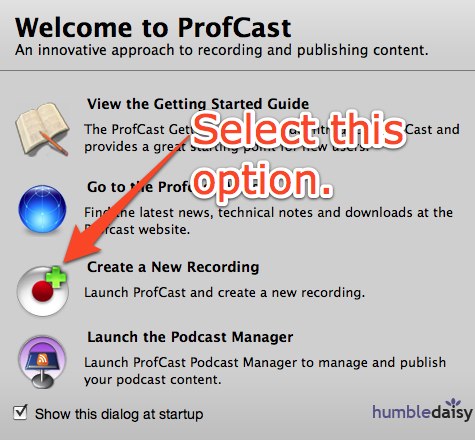
Step 5: Open the Profcast Program.
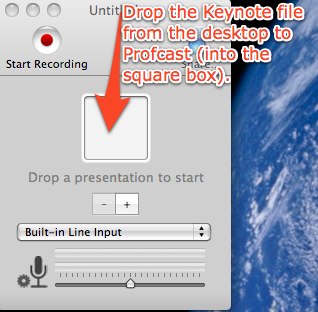
Step 6: Drop the Keynote file you are working with from the desktop to Profcast. To do this click on the file that is on the desktop hold/dragg, and positioning the file into the small square as indicated in the image below.
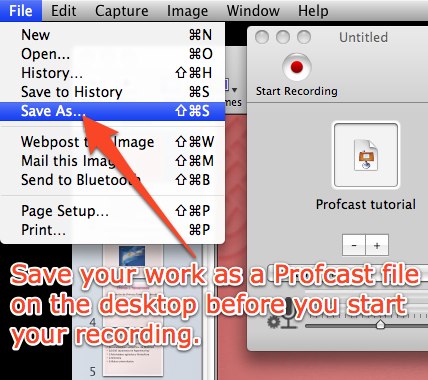
Step 7: Save your work as a Profcast file before you start recording.
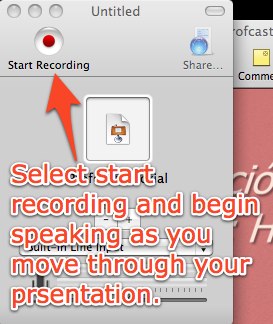
Step 8: Start recording by pressing the red record button.
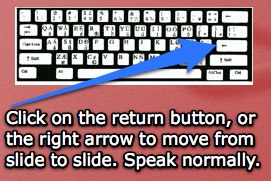
Step 9: Click on the Return button, or on the right arrow to move from slide to slide (The same way you would if you were using powerpoint or Keynote to give a presentation).
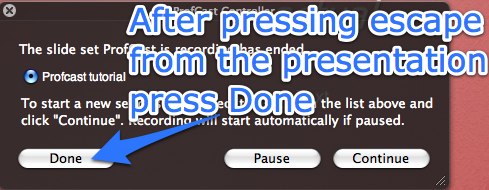
Step 10: Once you are done with your presentation, Click the Escape button (esc), and click on the Done option.
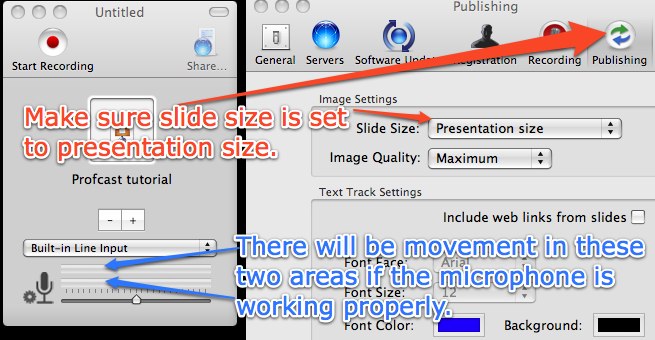
Step 11: We recommend you do a trial run to make sure your work is being recorded. Also check that there is sound by looking at the microphone icon and making sure there is activity when you talk (Microphone name should match what you are using such as the built in speaker of your laptop, an external microphone, etc.). Make sure that the publishing size is set to presentation size as seen in the picture below.
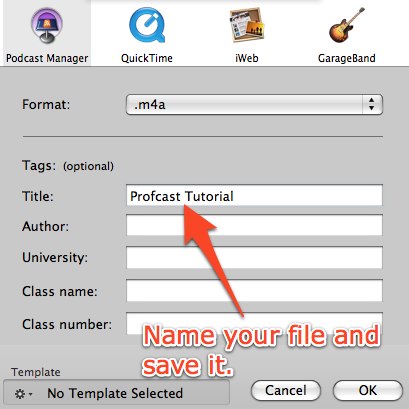
Step 12: Save your finished project as a Profcast file with the name you want.
YOU ARE DONE!!!
If you want to edit your project, export the file into Garageband by following the additional steps below.
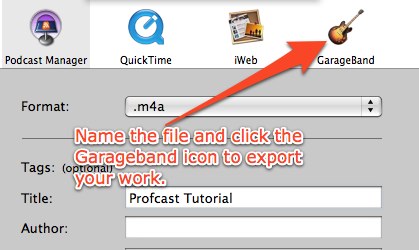
Step 1: Export the file to Garageband so you can edit your work later on. You do this by clicking on the Guitar icon for Garageband. Once you are done naming your file, click OK.
Step 2: Open Garageband, and save your file as a Garageband file. Press Save as, then click Archive, name your file and press save.
Step 3: Edit your work as you see fit, and save your work when you are all done. You can edit the video and the sound through Garageband.
Leave a Reply
 Name (required)
Mail (will not be published) (required)
Website

